How to Configure My Cameras
How to Setup Cameras for Photo Upload to the Aevocam Platform
Why do I need to configure my cameras?
The photo ingestion process requires that each of your internet-connected cameras to upload photos to our servers. Currently, we only offer FTP uploading. But realistically, that's all most cameras will offer you, if they offer uploading at all. Many of them will only automatically upload video or snapshots to their own proprietary cloud servers.
You need to tell each camera how to connect to our FTP server. You will also need to set a schedule for uploading photos.
Where do I find the FTP settings?
You need to have already defined a feed for your camera. On that page, you'll see these sections:
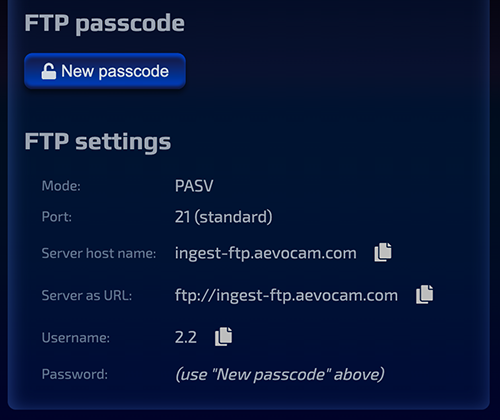
The FTP settings section should have all the settings that you will need for your camera. If you can edit your camera's settings from your computer or tablet, then take advantage of the "Copy to clipboard" buttons next to the settings.
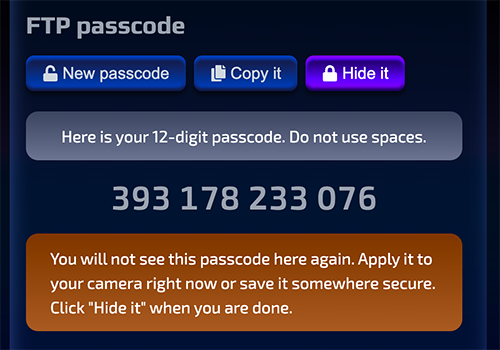
When you are ready to get the passcode you will enter in as the password in the camera's settings, click "New passcode". It should then look something like this:
How do I use the FTP settings?
Each camera vendor has their own dashboard or other tools for configuring their cameras. Let's consider a version of FOSCAM's dashboard. In this example, I have one camera connected:
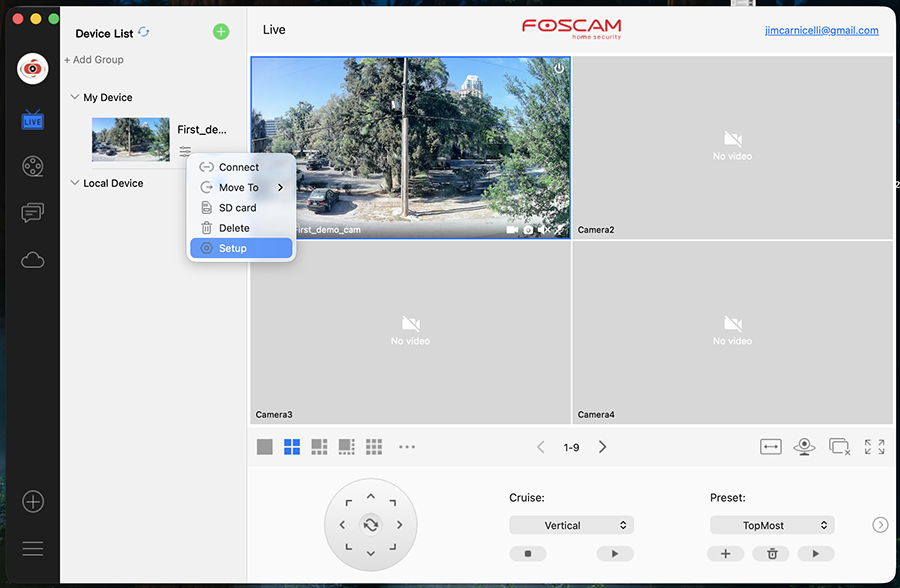
You click on the settings icon next to "My Device" and choose "Setup" from the drop-down menu. From the left-hand navigation menu, you will choose "Network" and then "FTP" from its sub-menu:
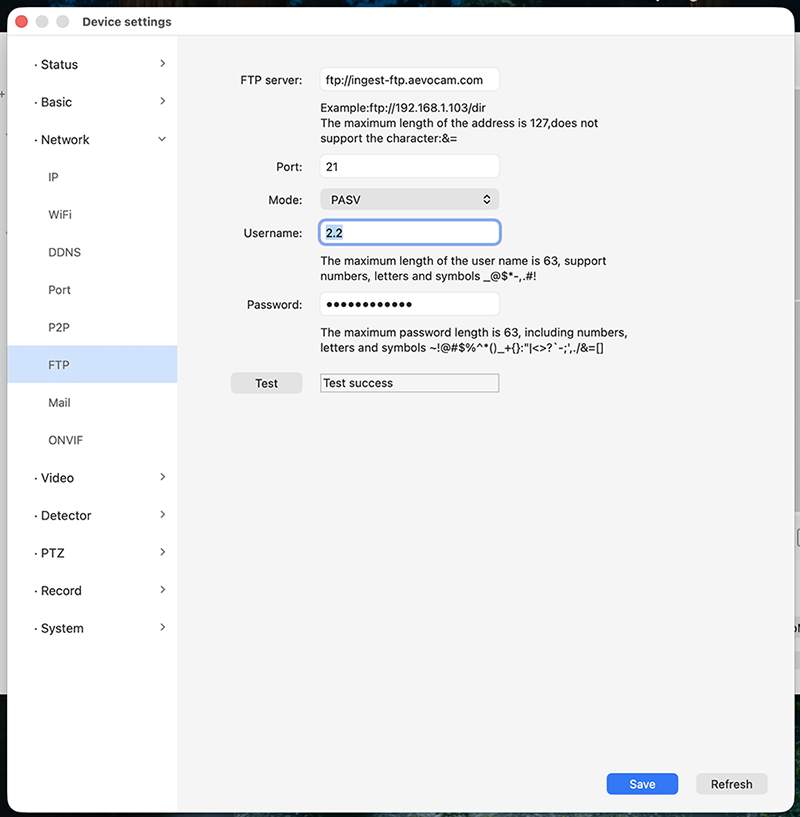
You only need to set these settings:
- FTP server: (copy from feed editor)
- Mode: "PASV".
- Username: (copy from feed editor)
- Password: (copy from feed editor)
Then you click "Test" at the bottom. You should see "Test success". If not, then you've likely set something incorrectly.
Next, click on "Video" in the left-hand navigation menu, and then "Snapshot" from its sub-menu:

You'll choose "FTP" for "Pictures save to" and check "Enable timing to capture". For capture interval, you will probably choose one of the following:
- 60 = Once per minute
- 300 = Once every 5 minutes
- 600 = Once every 10 minutes
- 900 = Once every 15 minutes
- 1800 = Once every half hour
- 3600 = Once every hour
The "Schedule" grid below allows you to narrow what blocks of time and which days of the week that you want to capture photos. In this setup, each little block represents a half hour. For example, on Sunday I have enabled all half-hour blocks from 8am to 7pm, but no later.
What you put in here will depend on the slots you define. You really should define slots in your feed editor! For several reasons. But this is technically optional. Let us say that you want to define 9am, noon, and 3pm slots. Here is a good setup for supporting that:
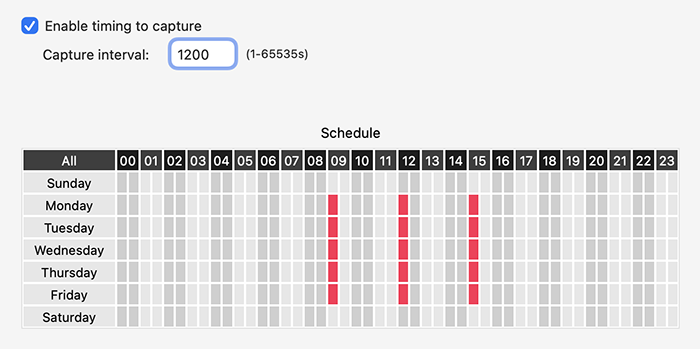
1200 (seconds) means once every 20 minutes. Since each red block represents 30 minutes, it means that there will be a photo sent at 9am, and another at 9:20am. Same for noon and 12:20pm and 3pm and 3:20pm. Why send a second photo for each of the 3 time slots? This does add some extra cost. But it gives you peace of mind. If the first photo on the hour never arrives, the second attempt 20 minutes later just might arrive. This increases the durability of your solution by automatically recovering from some short-term network failures. If you would rather save on ingestion costs, then you can use 4200 seconds, which is 70 minutes. That should guarantee that you only get one photo each hour to exactly fill your slots.